
推荐点击下面图片,通过本站淘宝优惠价购买:

centos7默认的gcc版本是4.8.5,无法编译高版本的glibc 2.28,需要升级到gcc 8.2版本
注:gcc高版本和glibc 2.28不兼容
## 查看自带默认的glibcstrings /lib64/lib.so.6 | grep GLIBC# 查看glibc 软件版本号rpm -qa | grep glibc
1. 安装glibc
wget https://ftp.gnu.org/gnu/glibc/glibc-2.27.tar.gz
tar -xvf glibc-2.27.tar.gz## 编译安装# 进入glibc-2.27目录中cd glibc-2.27# 创建build目录mkdir build# 进入build目录cd build# 执行./configure../configure --prefix=/usr --disable-profile --enable-add-ons --with-headers=/usr/include --with-binutils=/usr/bin# 安装make && make install## 查看共享库ls -l /lib64/libc.so.6## 再次查看系统中可使用的glibc版本strings /lib64/libc.so.6 |grep GLIBC_
执行./confiure报错:These critical programs are missing or too old: bison compiler
安装bison:yum install bison
继续执行./configure还是报错:These critical programs are missing or too old: compiler
2. 升级太高升到gcc-11.2.0去了。。
gcc11.2版本太高,无法编译glibc2.28(?),重新安装gcc8.2
3. 安装gcc-8.2.0依赖环境
yum install bison -y
yum -y install wget bzip2 gcc gcc-c++ glib-headers
4. 升级GNU make到make 4.2
wget http://ftp.gnu.org/gnu/make/make-4.2.1.tar.gz
tar -zxvf make-4.2.1.tar.gz
cd make-4.2.1
mkdir build
cd build
../configure --prefix=/usr/local/make && make && make install
export PATH=/usr/local/make/bin:$PATH
ln -s /usr/local/make/bin/make /usr/local/make/bin/gmake
make -v# 昨天使用这段命令安装的wget http://ftp.gnu.org/gnu/make/make-4.2.tar.gz
tar -xzvf make-4.2.tar.gz
cd make-4.2
sudo ./configure
sudo make
sudo make install
sudo rm -rf /usr/bin/make
sudo cp ./make /usr/bin/
make -v
5. 安装Python3.8
wget https://www.python.org/ftp/python/3.8.0/Python-3.8.0.tar.xz
xz -d Python-3.8.0.tar.xz
tar xf Python-3.8.0.tar
cd Python-3.8.0
./configure --prefix=/usr/local/python3
make -j 2 && make install
ln -s /usr/local/python3/bin/python3 /usr/bin/python3
ln -s /usr/local/python3/bin/pip3 /usr/bin/pip3
安装python3 make时报错Failed to build these modules: _ctypes
yum install -y libffi-devel错误提示:Python requires an OpenSSL 1.0.2 or 1.1 compatible libssl with X509_VERIFY_P
# 下载源码包wget https://ftp.openbsd.org/pub/OpenBSD/LibreSSL/libressl-3.0.2.tar.gz# 解压tar -zxvf libressl-3.0.2.tar.gz# 配置安装路径mkdir /usr/local/libressl
cd libressl-3.0.2
./configure --prefix=/usr/local/libressl# 安装make
make install# 创建软连接代替opensslmv /usr/bin/openssl /usr/bin/openssl.bak
mv /usr/include/openssl /usr/include/openssl.bak
ln -s /usr/local/libressl/bin/openssl /usr/bin/openssl
ln -s /usr/local/libressl/include/openssl /usr/include/openssl
echo /usr/local/libressl/lib >> /etc/ld.so.conf.d/libressl-3.0.2.conf
ldconfig -v# 验证是否安装完成openssl version
错误提示:echo权限不够
# 要给echo整条命令加单引号sudo sh -c 'echo /usr/local/libressl/lib >> /etc/ld.so.conf.d/libressl-3.0.2.conf'
错误提示:zlib not available
# 安装依赖sudo yum install zlib-devel bzip2 bzip2-devel readline-devel sqlite sqlite-devel openssl-devel xz xz-devel libffi-devel
6. 安装gcc8.2.0
# 下载并解压wdget https://mirrors.tuna.tsinghua.edu.cn/gnu/gcc/gcc-8.2.0/gcc-8.2.0.tar.gz
tar xf gcc-8.2.0.tar.gz
cd gcc-8.2.0# 下载gmp mpfr mpc等供编译需求的依赖项./contrib/download_prerequisites# 配置mkdir build
cd build
../configure --prefix=/usr/local/gcc-8.2.0 --enable-bootstrap --enable-checking=release --enable-languages=c,c++ --disable-multilib# 编译安装make -j 2
make install# 修改环境变量,使得gcc-8.2.0为默认的gccvi /etc/profile.d/gcc.sh# 导出头文件[yy@localhost profile.d]$ sudo ln -sv /usr/local/gcc-8.2.0/include/ /usr/include/gcc
"/usr/include/gcc/include" -> "/usr/local/gcc-8.2.0/include/"
7. 由于之前安装了gcc11.2需要做一下修改
# 应用环境变量echo -e '\nexport PATH=/usr/local/gcc-8.2.0/bin:$PATH\n' >> /etc/profile.d/gcc.sh
source /etc/profile.d/gcc.sh# 删除库文件sudo rm /etc/ld.so.conf.d/gcc.conf# 设置库文件touch /etc/ld.so.conf.d/gcc.conf
chmod 777 /etc/ld.so.conf.d/gcc.conf
echo -e "/usr/local/gcc-8.2.0/lib64" >> /etc/ld.so.conf.d/gcc.conf# 加载动态连接库ldconfig -v# 查看gccldconfig -p |grep gcc# 重启服务器reboot
8. 配置glibc2.28还是报错compiler
# 尝试昨天失败的命令sudo sh -c 'echo "source /opt/rh/devtoolset-8/enable" >>/etc/profile‘
../configure命令成功

9. 编译
sudo make
sudo make install
make install的报错
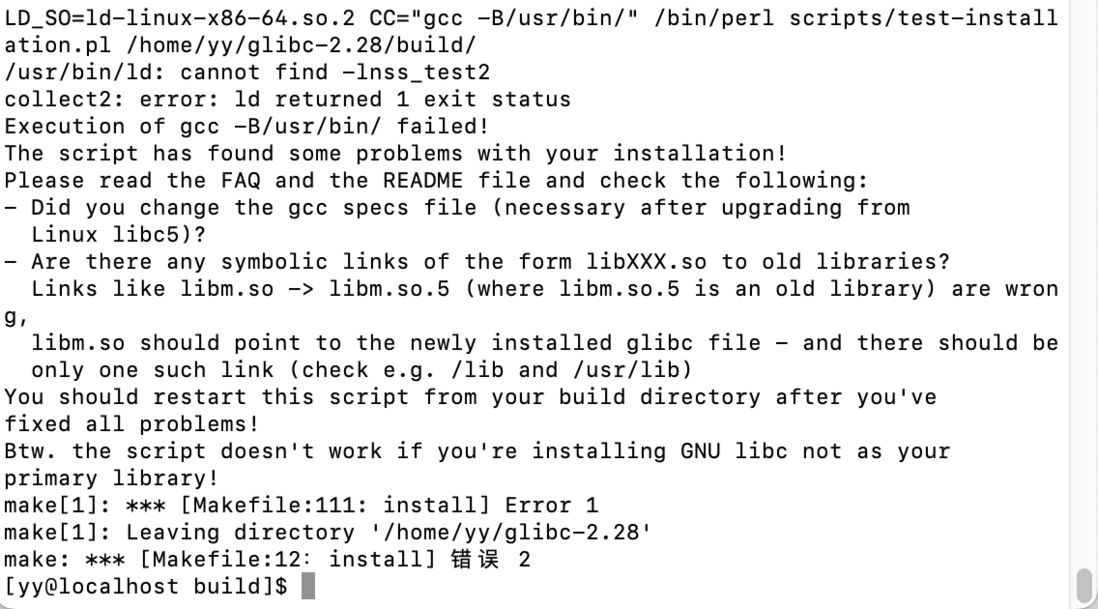
可以不用管
10. 验证是否成功
[yy@localhost build]$ strings /usr/local/gcc-8.2.0/lib64/libstdc++.so.6 | grep GLIBCXX_
GLIBCXX_3.4
GLIBCXX_3.4.1
GLIBCXX_3.4.2
GLIBCXX_3.4.3
GLIBCXX_3.4.4
GLIBCXX_3.4.5
GLIBCXX_3.4.6
GLIBCXX_3.4.7
GLIBCXX_3.4.8
GLIBCXX_3.4.9
GLIBCXX_3.4.10
GLIBCXX_3.4.11
GLIBCXX_3.4.12
GLIBCXX_3.4.13
GLIBCXX_3.4.14
GLIBCXX_3.4.15
GLIBCXX_3.4.16
GLIBCXX_3.4.17
GLIBCXX_3.4.18
GLIBCXX_3.4.19
GLIBCXX_3.4.20
GLIBCXX_3.4.21
GLIBCXX_3.4.22
GLIBCXX_3.4.23
GLIBCXX_3.4.24
GLIBCXX_3.4.25
...

[yy@localhost build]$ strings /lib64/libc.so.6 | grep GLIBC
GLIBC_2.2.5
GLIBC_2.2.6
GLIBC_2.3
GLIBC_2.3.2
GLIBC_2.3.3
GLIBC_2.3.4
GLIBC_2.4
GLIBC_2.5
GLIBC_2.6
GLIBC_2.7
GLIBC_2.8
GLIBC_2.9
GLIBC_2.10
GLIBC_2.11
GLIBC_2.12
GLIBC_2.13
GLIBC_2.14
GLIBC_2.15
GLIBC_2.16
GLIBC_2.17
GLIBC_2.18
GLIBC_2.22
GLIBC_2.23
GLIBC_2.24
GLIBC_2.25
GLIBC_2.26
GLIBC_2.27
GLIBC_2.28
GLIBC_PRIVATE
...

[yy@localhost build]$ ldd --version
ldd (GNU libc) 2.28
Copyright (C) 2018 Free Software Foundation, Inc.
This is free software; see the source for copying conditions.  There is NO
warranty; not even for MERCHANTABILITY or FITNESS FOR A PARTICULAR PURPOSE.
Written by Roland McGrath and Ulrich Drepper.
本文链接:http://www.hqyman.cn/post/5370.html 非本站原创文章欢迎转载,原创文章需保留本站地址!
休息一下,本站随机推荐观看栏目: